Shopify Tutorial: How to Set Up Store Shipping Fees
Recently, there have been many buyers inquiring about how to set up store shipping on Shopify. So, I have written a detailed tutorial on setting up shipping for a Shopify store, providing step-by-step instructions for reference.
Setting up store shipping on Shopify requires the following steps.
Step1: Add "Markets"
Note:If you have already set up your markets, you can skip this step and proceed to the next one.
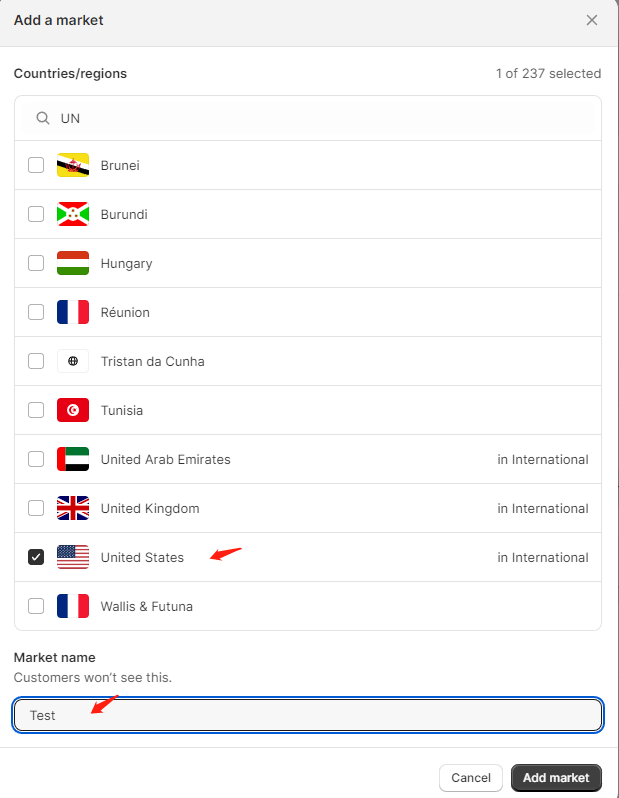
Before setting up shipping fees, you need to add the countries or regions where you want to sell your products in the "Markets" section. For example, if you wish to sell your products in the United States and it is not included in your markets, customers from the United States will not be able to complete the regular shopping process (unable to set shipping fees for users in the United States, unable to proceed to checkout).
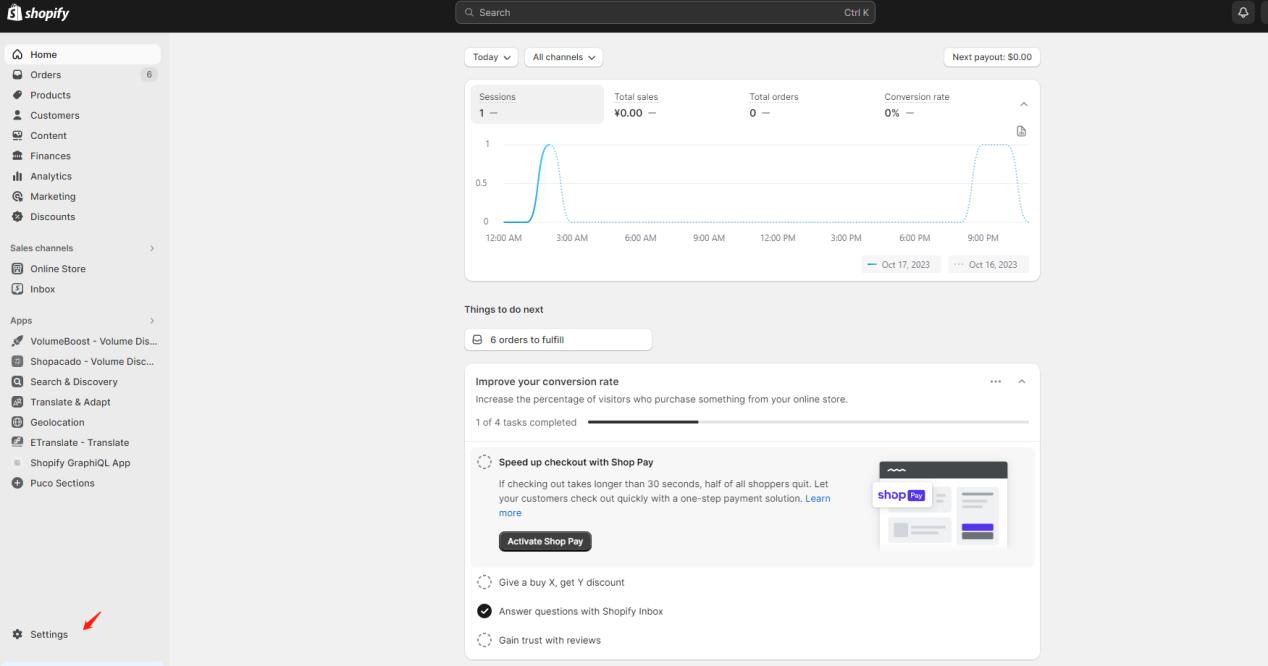
1. After opening the Shopify admin dashboard, click on the "Settings" option located in the bottom left corner.
2. Find "Markets" in the left-hand menu and click on it
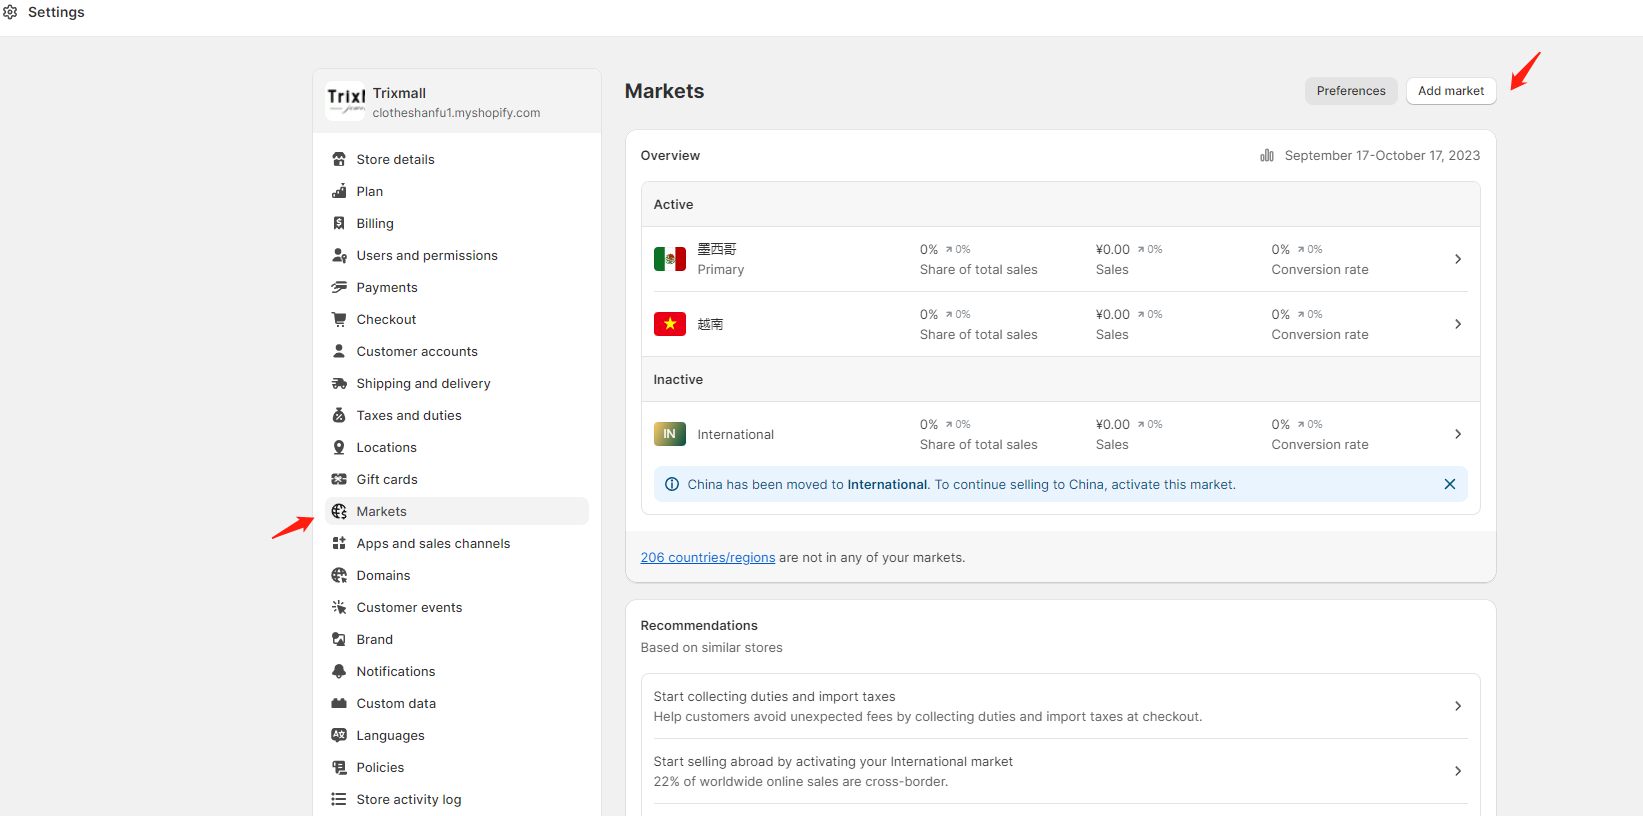
Assuming your store currency is set to US dollars (USD), your primary market will be automatically set to the United States. Other markets, particularly international markets, will be initially in an inactive state. To activate a specific market, you need to modify the countries or regions within that market and then proceed with setting up shipping fees before officially activating the market.
Step2: Setting up Locations
1. If your products need to be shipped from multiple fulfillment centers or warehouses, you can achieve this by adding store locations. This allows you to manage inventory for different locations and even create custom shipping fees for them.
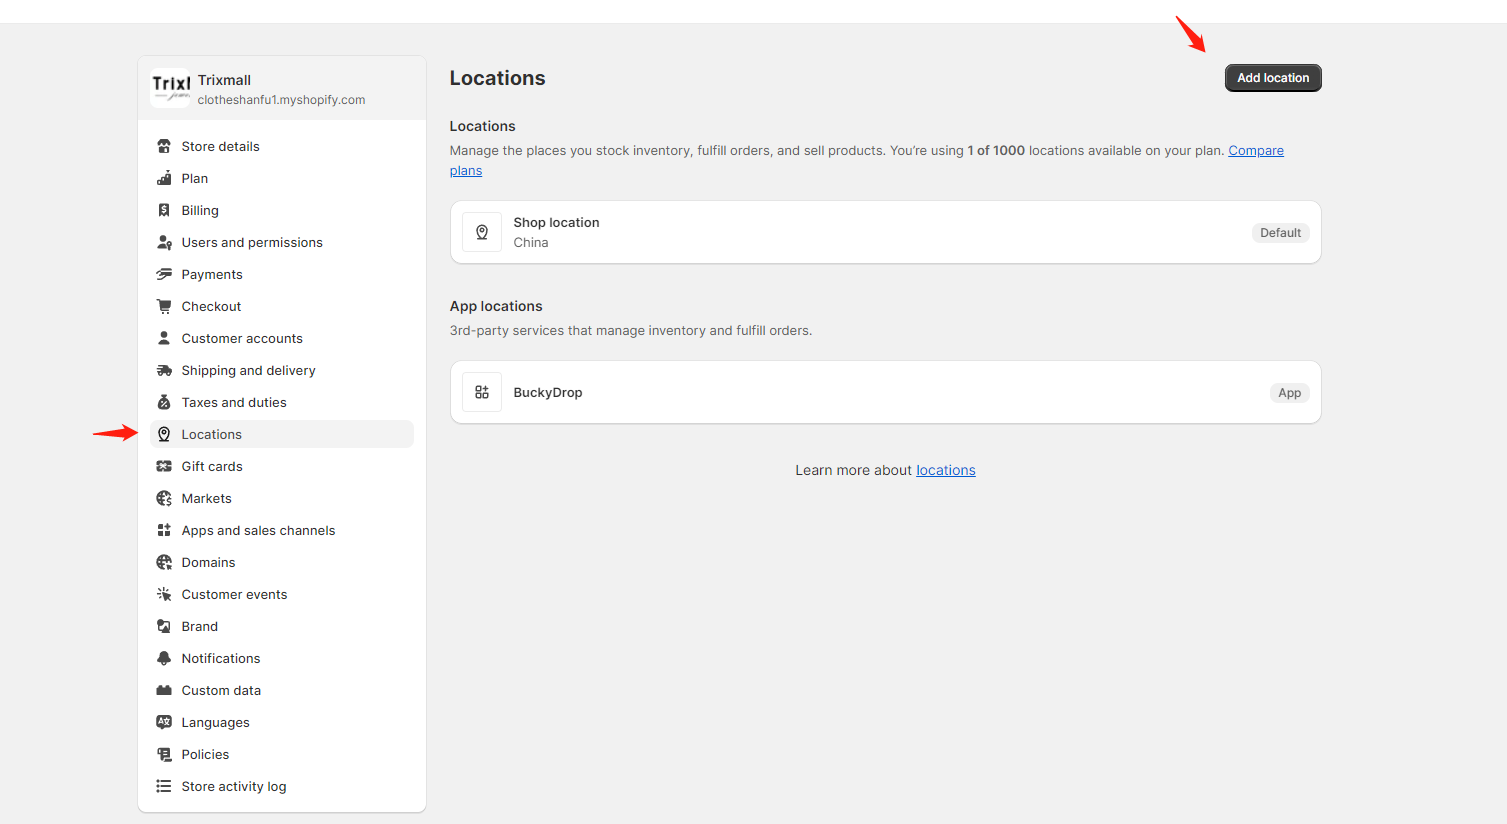
We find "Locations" in the same interface and click on "Add location" at the top right to add new shipping locations (warehouses) for the store.
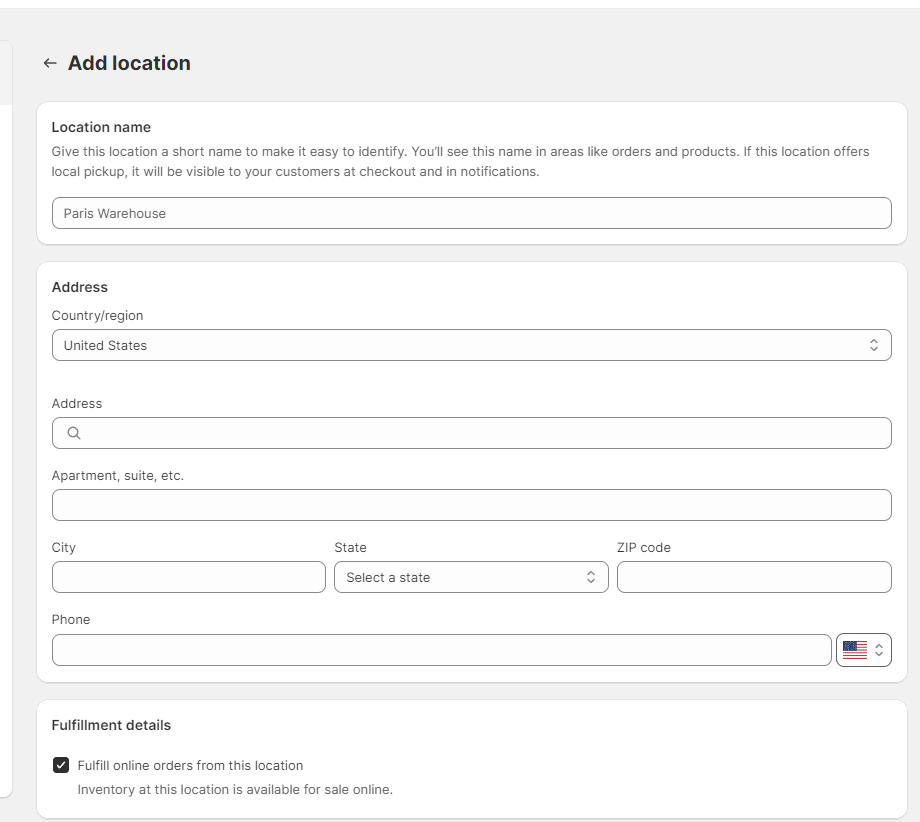
2. Following the relevant prompts, fill in the store location information accurately. Once you have completed the form, click on "Save" at the top right corner to save the changes.
Step3: Setting Up Shipping Templates
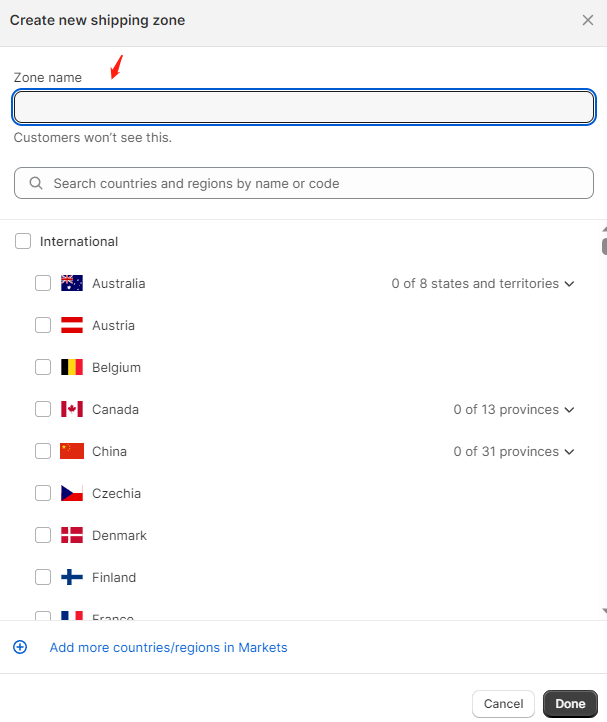
1. Set shipping area
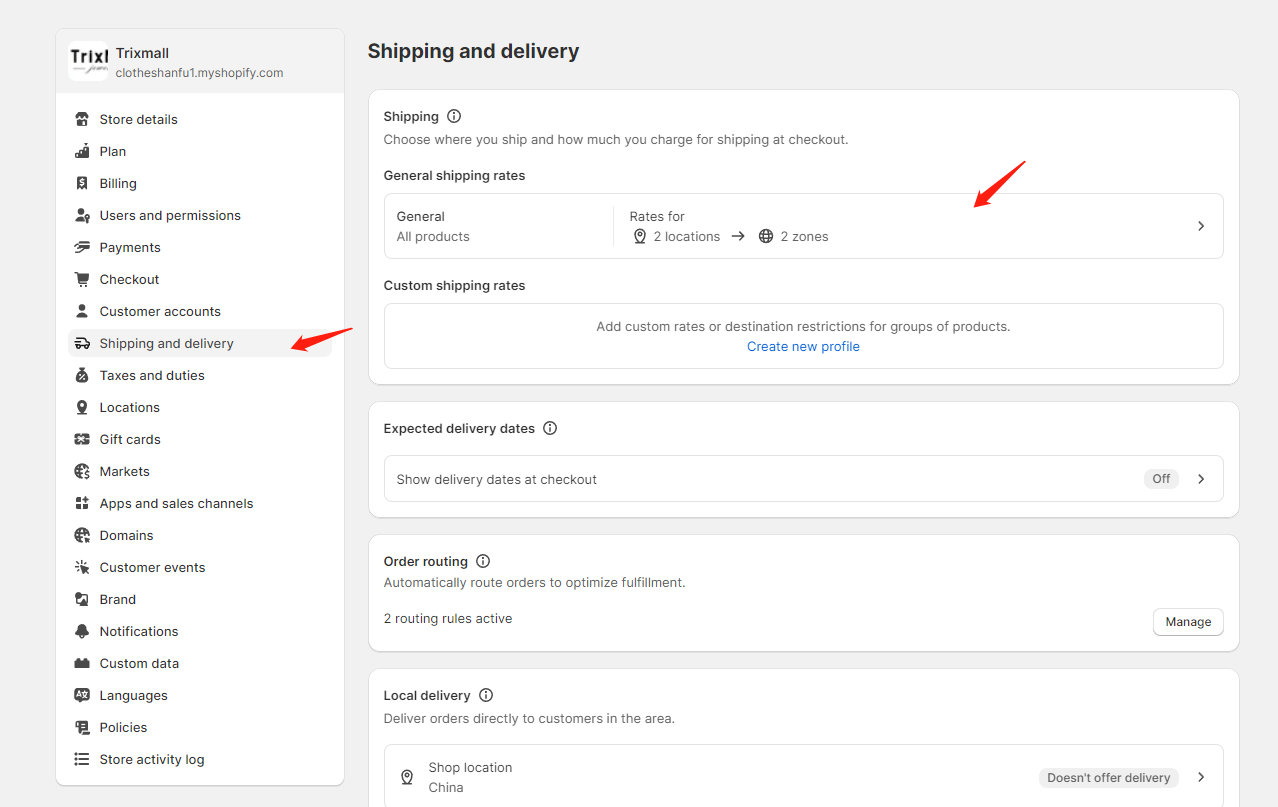
First click [Shipping and delivery] on the left, then click [General shipping rates] on the right.
2.General Shipping Rates (Standard Shipping Presets)
There are two types of general shipping rates available in Shopify.
① Custom Rates
② Carrier Calculated or App Calculated Rates
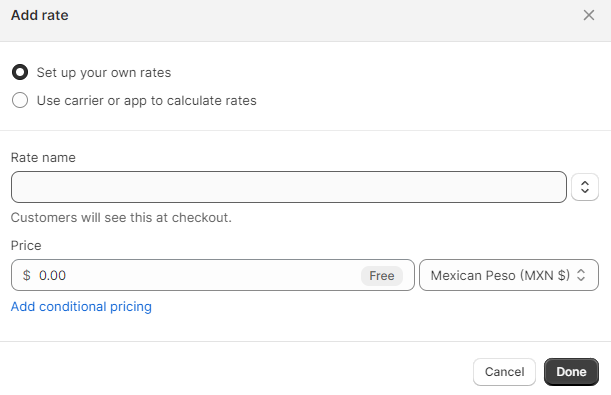
2.1 Custom Rates
Custom rates can be categorized into the following two types:
① Weight-based Rates
② Price-based Rates
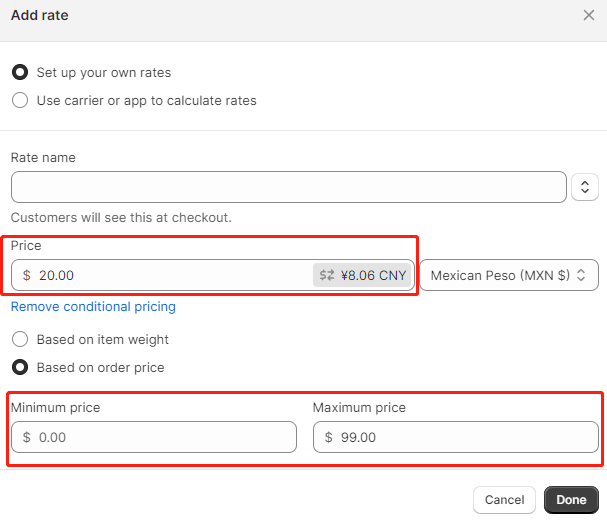
You can set up shipping rates by combining shipping fees with price (or weight) ranges.
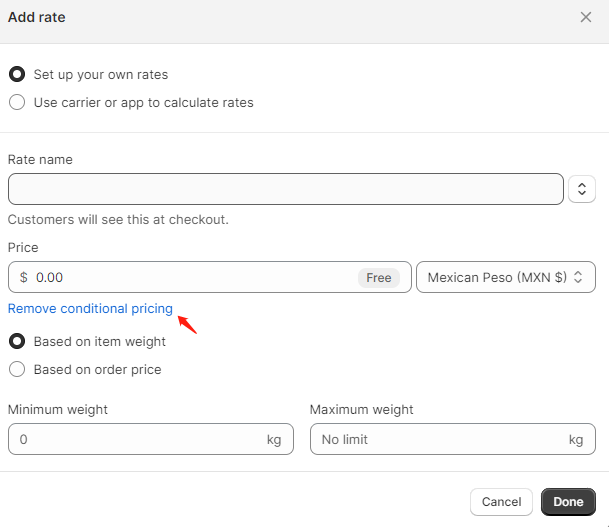
Example 1:Example 1:Here's an example of a setting that offers free shipping for orders totaling $ 100 or more.

Example 2: Fixed Shipping Fee of $20 for Orders with a Total Amount between $0 and $99.
As mentioned earlier, the marketplace within our store is in an inactive state by default (excluding the primary market). After completing the shipping rate setup, we need to return to the marketplace and activate it in order for our shipping rates to take effect in that specific marketplace.
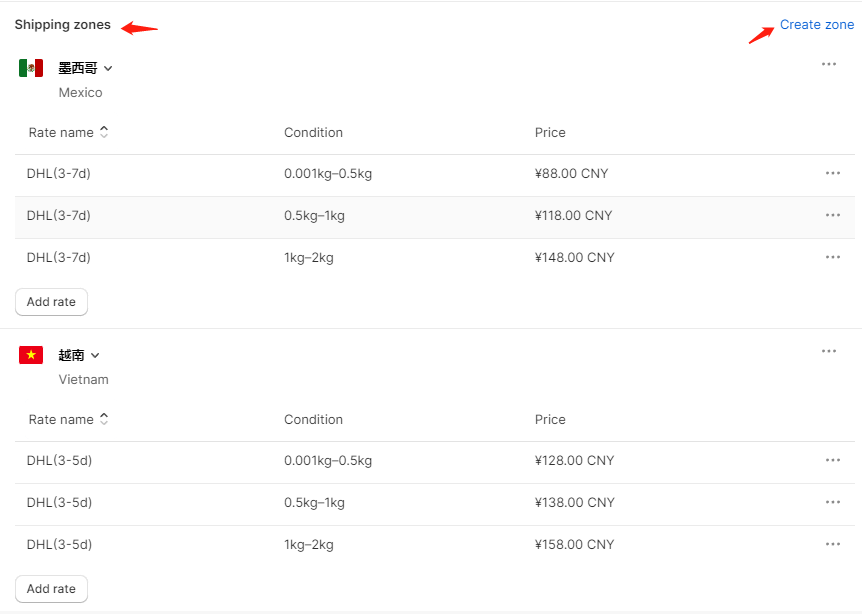
Please note that the countries included in the marketplace must be selected and have shipping rates set in the "Shipping Zones" section to complete the marketplace activation.
For example, if the European marketplace includes Lithuania as a country, but Lithuania is not included in the shipping zones, the European marketplace will not be eligible for activation.
When your configured shipping rates are not available in your store, you can check whether the marketplace section has been activated. The marketplace and shipping rate settings are interdependent, so if issues arise, you can investigate them from the marketplace section.
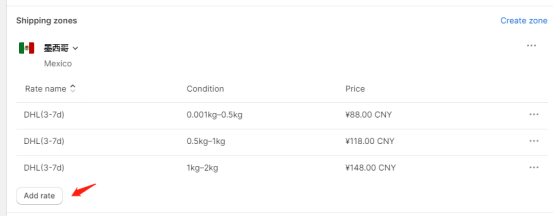
3. Custom Shipping Rate
If you have certain products in your store that require different shipping methods from the regular products (e.g., oversized surfboards requiring freight shipping) or if products are shipped from different locations with varying shipping costs (e.g., US warehouse to the US, US warehouse to Europe with different rates), you can use custom shipping presets to flexibly set up your shipping rates.
Custom shipping allows you to select specific products, warehouse origins, destinations, or combinations thereof to set different shipping rates. If you have multiple shipping rules, create separate shipping presets for each rule to set them individually.
If you want to offer free shipping for specific customer orders, the most convenient method is to set up a unique discount code for customers to use during checkout.
By utilizing these features, you can accommodate unique shipping requirements and provide tailored shipping options to meet the needs of different products, warehouses, and destinations in your store.


Learn More
➜ Contact Us: marketing@buckydrop.com