One Automatic Logistics Workflow: BuckyDrop Guide to Logistics Automation Tools
Learn how to set up one automatic logistics workflow in BuckyDrop, including route settings, parcel auto-submission, and shipping automation tools.
BuckyDrop offers a wide range of automation tools, including automated purchasing, ordering, and logistics. When properly configured, these tools can save sellers a significant amount of time. However, many sellers may still be unsure about how to use or set up these features. Today, we will provide a detailed overview of automated logistics.
What Is One Automatic Logistics Workflow?
Automated logistics refers to setting specific rules and conditions so that when an order is generated, the system automatically selects the corresponding logistics route based on predefined criteria and rules.
To set up automated logistics, you need to follow several steps:
Step 1: Determine Available Logistics Routes and Shipping Costs
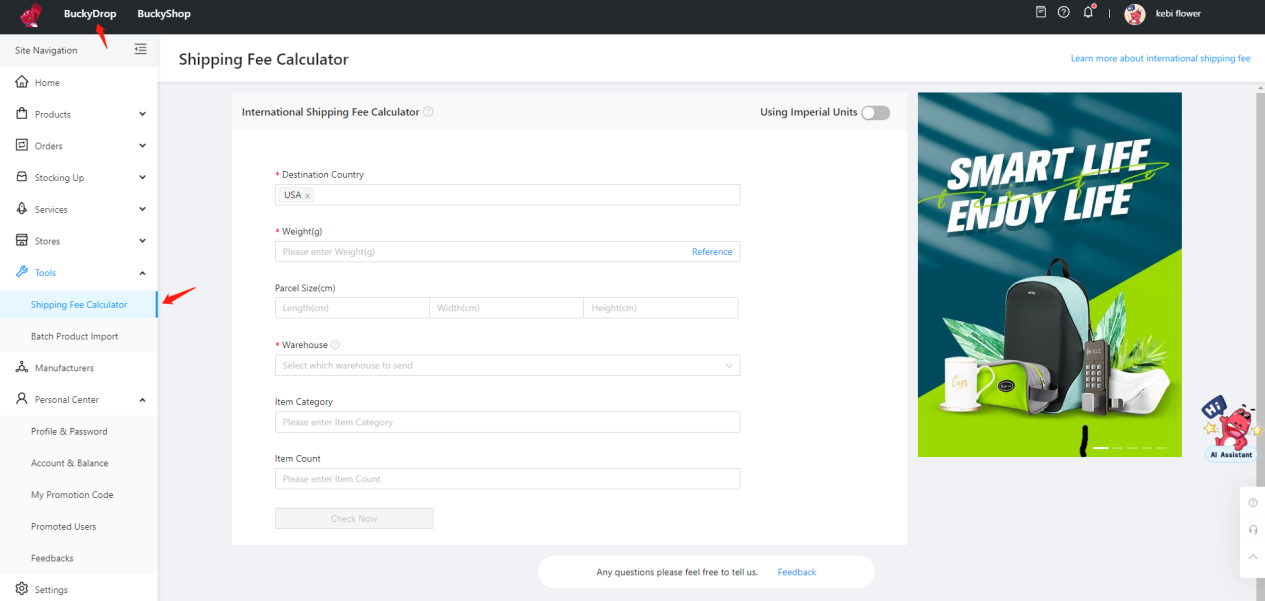
Before setting up logistics automation tools, it's important to determine the available logistics routes and shipping costs for the destination. This information can be obtained using BuckyDrop's "Shipping Fee Calculator" feature.
1.Log in to your BuckyDrop account.
2.Click on "Tools" in the menu.
3.Select "Shipping Fee Calculator" from the options.
4.Fill in the shipping information based on the destination, category, and warehouse specific to your store's operations. Provide as detailed information as possible.
5.Once all the required details are entered, click on "Check Now."
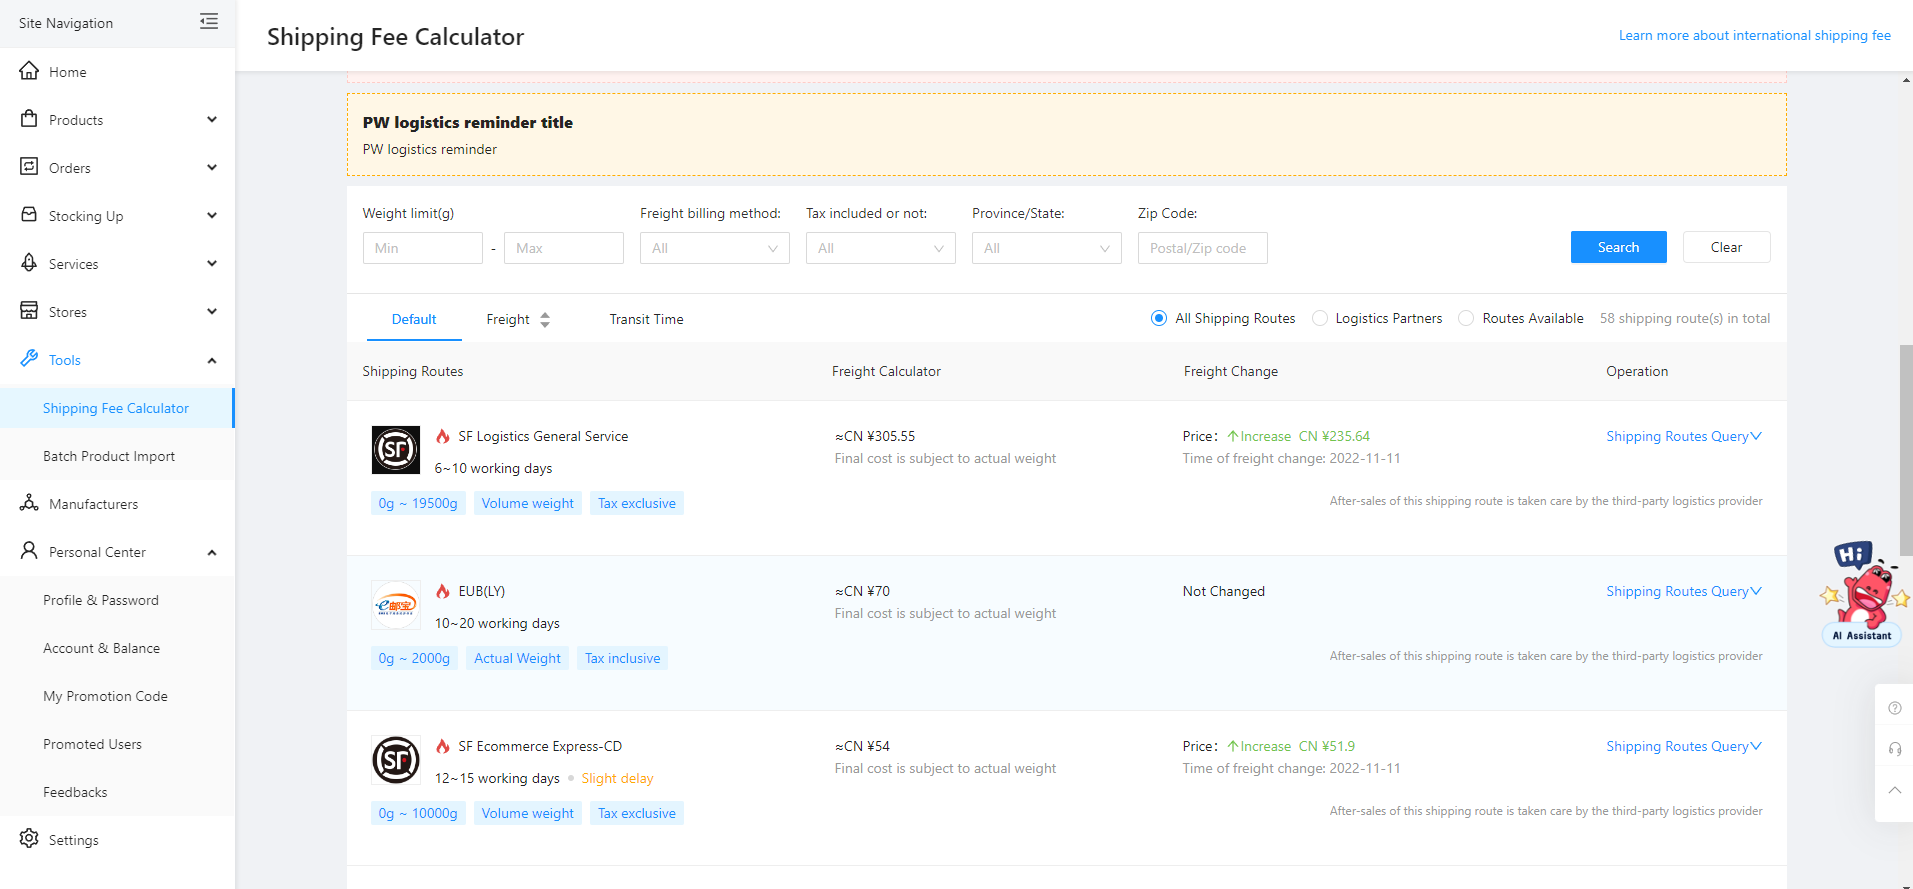
6.Once you have the list of available logistics routes displayed, you can find the suitable one based on various criteria such as delivery time, cost, and eligible shipping regions. Filter and record the selected options that meet your requirements. These recorded options will be used when setting up automated logistics.
Please note that the shipping costs calculated by the Shipping Fee Calculator are estimated costs. The actual costs may vary and will be determined at the time of settlement.
Step 2: Setting Up One Automatic Logistics Rule System
1. Parcel Auto-Submission
① Click on the left side navigation menu "Settings"
② Select "Parcel AutoSubmission."
③ Enable the option "Enable Parcel AutoSubmission"
④ Proceed to the "Route Settings" section
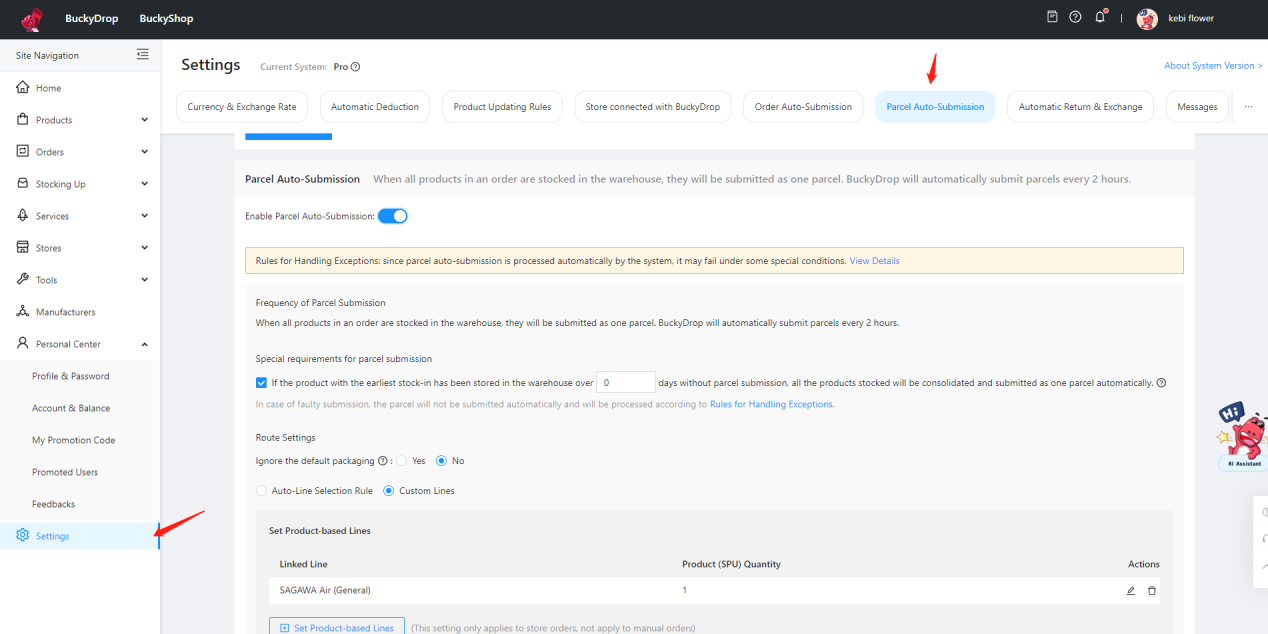
1. Route Settings
The route selection has two options:
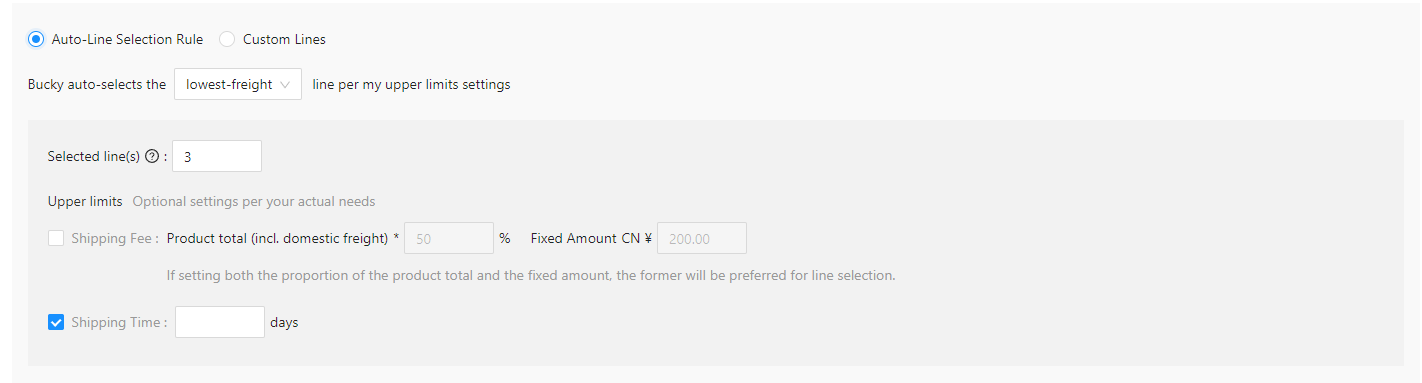
① Auto-Line Selection Rule
The automatic selection strategy refers to not specifying a specific logistics provider. Instead, the system filters available logistics options based on the criteria set, such as "lowest price" or "fastest delivery time." Users can also set a maximum percentage or fixed amount for shipping fees relative to the total order amount. Additionally, users can set a maximum number of days for the minimum delivery time. If the conditions are not met, the system will be unable to place an order automatically.
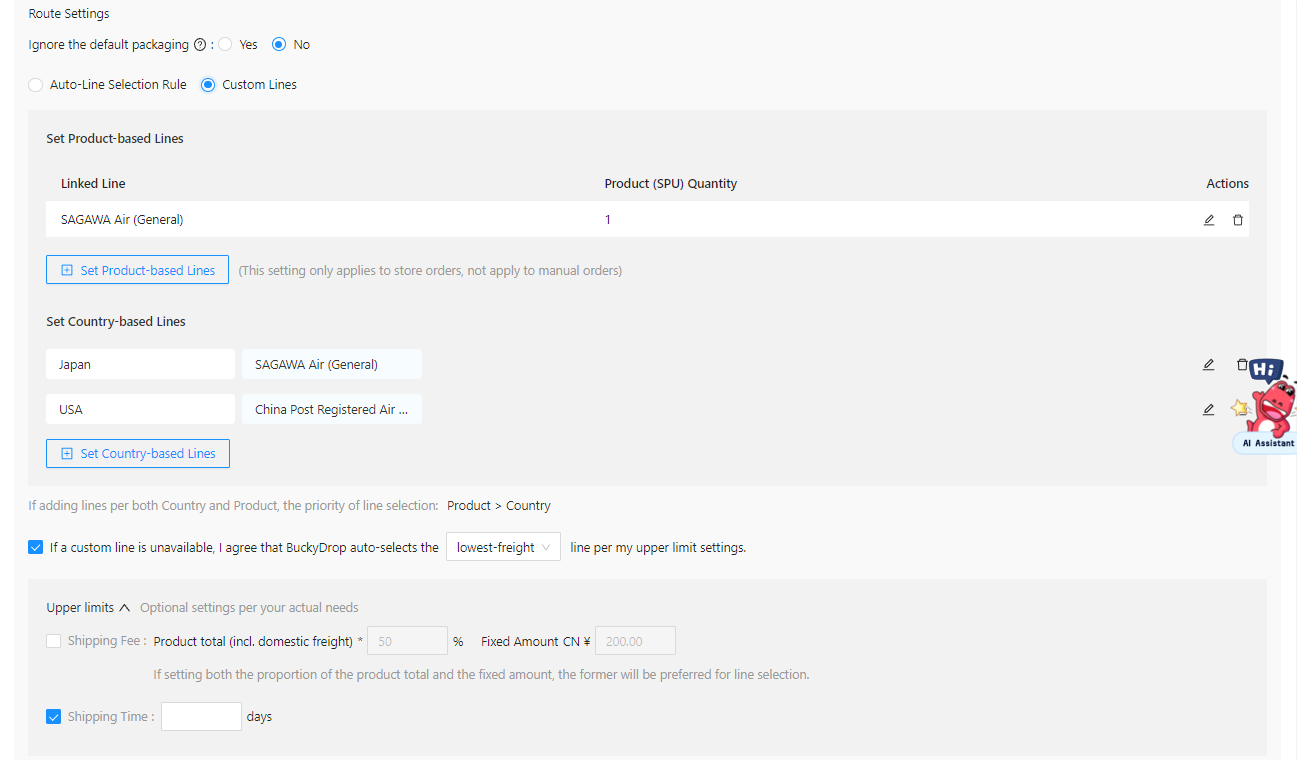
② Custom Lines
For custom routes, you can set specific logistics providers based on products or countries. These specified logistics providers can be determined using the "Shipping Fee Calculator" tool. It is also recommended to enable the "Auto-Line Selection Rule" to prevent order failures in case the specified logistics provider is unavailable.
Step 3: Store Settings
If you are a seller on platforms like Shopify/Woocommerce, after completing the two steps mentioned above, you also need to set up the store's shipping fee template based on the previous settings.
We recommend that when BuckyDrop pushes products to your store, you can set the shipping fees to be included in the product price. When setting up the store's shipping fees, it is advisable to create a general template for free shipping. Here are the steps to set up including shipping fees in the product price in BuckyDrop.

Recommended Articles:
Store Operations: Product Pricing Strategy
Learn More
➜ Contact Us: marketing@buckydrop.com